
Setup Custom SSH Profiles in Windows Terminal
Windows 10 has OpenSSH support that is now enabled by default as of version 1803. To make quick use of this feature you can create custom options in Windows Terminal’s drop-down menu. We will do this by adding a new profile to the Windows Terminal settings file. If you have not yet installed Windows Terminal follow the instructions in this post first to get started.
To get started launch Windows Terminal, click on the drop-down menu, and select Settings (or use the shortcut Ctrl+,). This should open the profiles.json file in whatever your default editor for JSON files is, in my case VSCode.
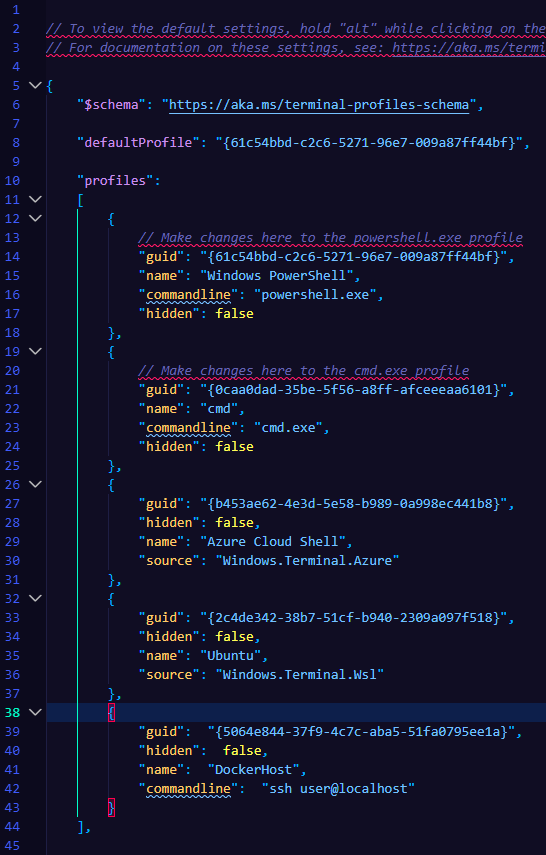
In the profiles section add a comma after the last profile in the list followed by a new curly-bracketed section. Copy the below template and paste it after the last profile in the list as shown in the screenshot above.
}, //Make sure to add a comma here after the previous profile in the list.
{
    "guid":  "{5064e844-37f9-4c7c-aba5-51fa0795ee1a}", //Random GUID
    "hidden":  false,
    "name":  "DockerHost",
    "commandline":  "ssh user@localhost" //username@hostIP
}
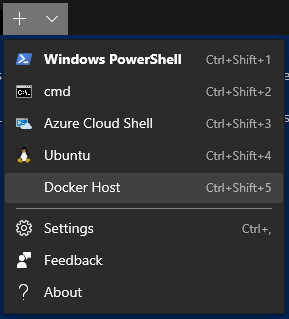
You will need to provide a random GUID for each profile, you can either make changes to an existing one or use a generator online just as long as they are all unique. Choose a name for your profile, this is what will show up in the Windows Terminal drop-down menu. Finally, edit the commandline to something appropriate for your local or remote host, ex. ssh docker@192.168.0.42. Save the file then return to Windows Terminal. You should see your new entry similar to the screenshot below.
You can, of course, continue adding profiles in this manner to handle other connections you may require. I am currently unsure if there is a limit to the number of profiles you can have; if you find out let me know in the comments below.
Leave a comment